DIY Wall Pocket Organizer: Room Revamp Series

Third post within the same month! Hallelujah!
Welcome to the most ambitious DIY project I have done for this blog to date aka Room Revamp #2. It's funny because I wasn't even planning on making this! Two weeks ago I didn't even know what wall pockets were. However, the algorithms of Pinterest started to enlighten me on these artsy and intriguing organizers since 1) I have been eyeing a lot of sewing tutorials with linen outfits, and naturally some of these sewing blogs have other DIYs too and 2) I have been avidly looking for ways to keep my room more organized as the semester approaches. Hence, the "Room Revamp Series." I'm trying to think in my head if that sounds okay. Room Restoration? Renovation? Rehabilitation?
As I looked at canvas wall pockets on Pinterest, I thought to myself, "I can just buy one." So I looked at Target.com and supposedly there was "ONE LEFT" available in-store. (Does that panic anyone else...) but I should've known that there was no hope. I went naively into the store, circled around a few times, and discovered it was no where to be found. I did end up getting an oil diffuser 50% off for $10!
Nope, the story doesn't end there. I was actually planning for this DIY post to be a simple wall decor banner with the leftover scraps of linen I used to sew a top. It was going to have some sort of lettering or design that I would paint/draw on. After I had sewed the pocket of space for the dowel, I had a moment where I completely abandoned my plans. I thought, "I don't want a mere decoration. I want something functional." Maybe this is the reason why I love art, creativity, and can't understand why people like math. I don't always like to follow what's logistical or "step one two three." I tend to run with my intuition and figure it out a long the way, which is not always helpful. This project took me longer than expected (probably 7-8 hours) because I was definitely making it up throughout the span of two days. You can take into account taking pictures, realizing many mistakes, sewing hems of the pockets, e.t.c. When I say "making it up" I am dead serious, because I didn't even know if it would turn out okay until the end. It was spontaneous, a lot of work, but 1000% worth it! I tried my best to actually make this post informative and detailed, unlike that DIY bucket hat post where I put two pictures and called it a day!
the M A T E R I A L S
Fabric Scissors
Measuring Tape
Pins + Sewing Needle
Sewing Machine
Thick & Sturdy Fabric
White or Clear Thread
Wooden Dowel
Podcasts to listen


12x18
fabric
[ 2 inches ] [8 inches] [ 2 inches ]
Pretend that the line above is the dowel. The dowel was 12 inches long, so I made sure the width of the fabric cut-out = 8 inches, so that there was 2 inches of space on each side to attach the twine later.
the T H R E A D

switch the thread
I started this project in the afternoon, but beforehand in the morning I was working on fixing up a pair of Levi Jeans that I bought for $10. They were 6 inches too wide for my waist, but I decided to tinker with them to learn about resizing pants so that I can become a upcycling pro mwahaha. Since I was using a navy thread to match the likes of the jean, I needed to switch the bobbin and thread with a color that matched linen. The one below was an elastic, clear thread that I found randomly in our house. It started to give me problems because it snapped so easily, so I switched to a white thread at the end of the project. There was no visible difference!

the F A B R I C
Note: I bought my linen fabric from Joann on sale for $6/yard. Its original price was $15/yard, so I saved $18! Online there is a 2 yard minimum, and 2 yards is actually not that much if you're planning on using it to sew clothes such as pants.

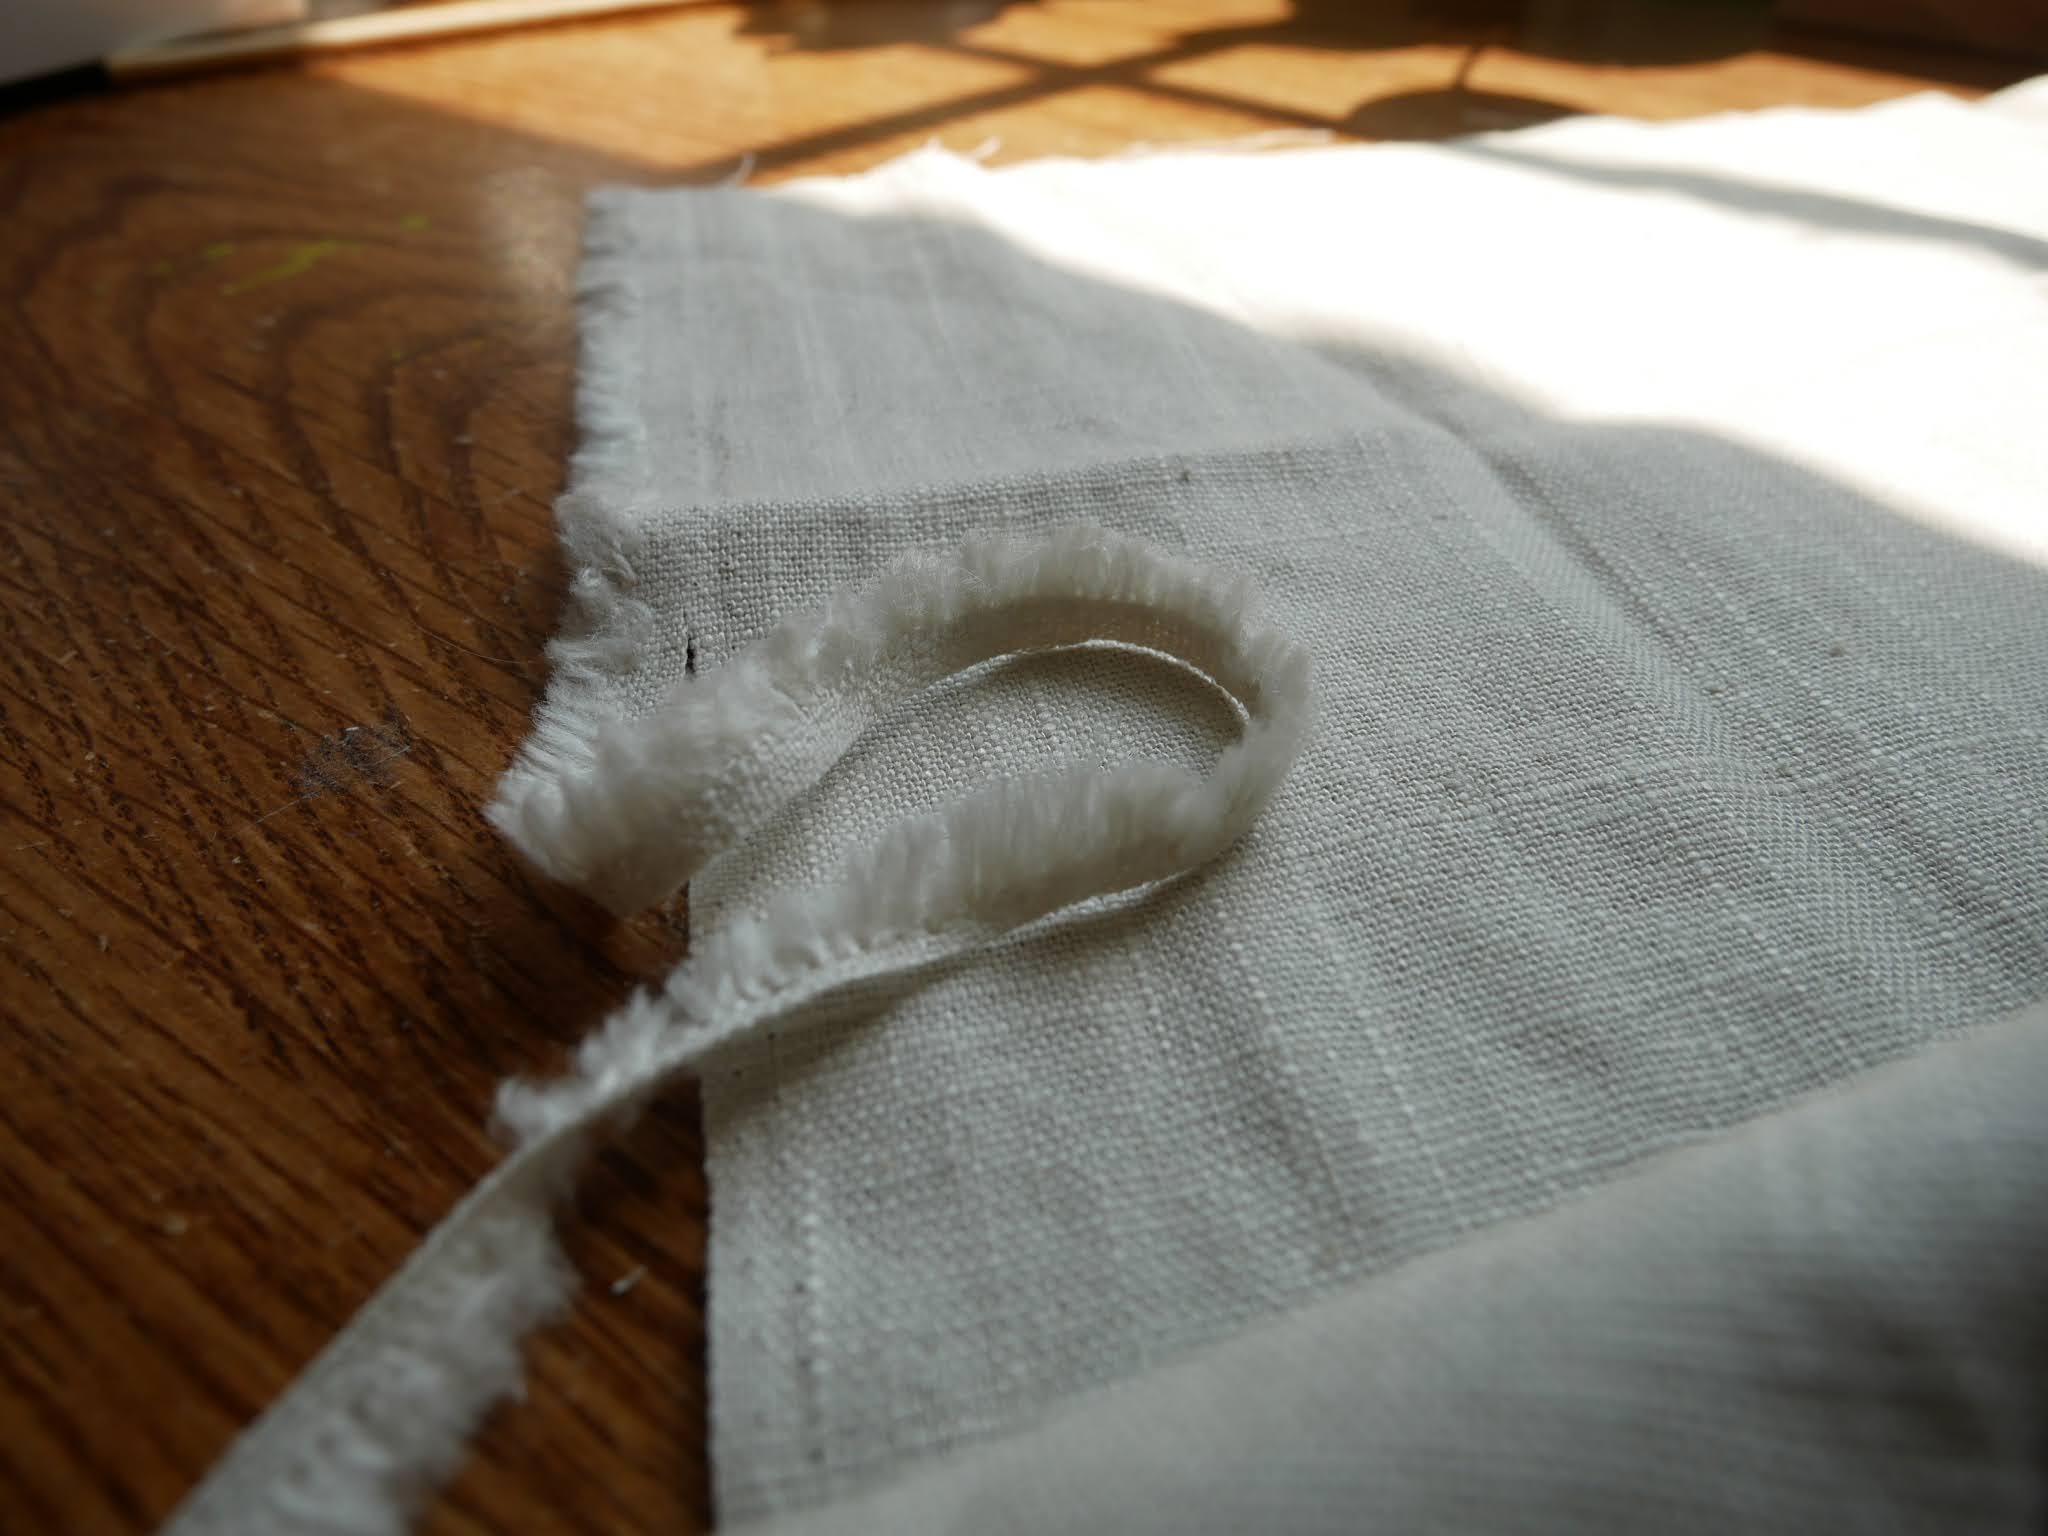
My first hurdle revolved around the trim. On this scrap of fabric that I cut out, there is a trim that remains only on one side. I really liked it and all I knew at this point was that I wanted it to be at the bottom of the wall pocket with possible layers to give it a nice design. I didn't even know what I wanted my wall pocket to look like at the moment! However, the dowel I have is not that large, and it would be way more convenient if the wall pocket was long in length to make up for its short width. Plus, it has a nicer look in my opinion. If I had just decided to cut it as it was shaped above, then it would be a very short and small wall pocket with the inability to hold much.

I love this fluffy beautiful trim! Continue reading to see the solution to the dilemma.
the T R I M
Then I had to remind myself - wait, you know you can sew the trim back on to the wall pocket? That's the point of sewing - to attach things together. Below you can see that I cut the trim off and later pinned three rows of 8 inch trims at the bottom of the blank piece of linen.

A bit scruffy! Evidence of me hastingly cutting things.

A sneak peek at the final product! I pondered: "should I layer the lace right on top of each other? Should there be 2 or 4 rows?" In the end, I liked the spacing and how it turned out! That's the great thing with pins, you can always unpin and rearrange what you're about to sew and get a feel for the finish.
the D O W E L
I actually found this dowel in our house during the school year lying around. Instead of throwing it away, I saved it for months and one look at it sitting on my desk reminded me that I could do so much with it - make a banner/wall decor/macrame...It finally came to good use! If you want to go a step further, you can use wood stain to deepen the color of your wooden dowel. I was going to, but I was so pooped at the end and I like how its pale color matches the linen.


Look at how thin and empty the fabric looks! In order to strengthen the fabric so that it could hold up its future weight, I simply sewed straight lines around the perimeter and area of the linen. I learned this when I sewed the bucket hat - sewing multiple lines will strengthen the fabric. Bucket hats have those multiple lines of thread circulating around the top which allows it to hold up its unique shape. An example can be seen below.

the P O C K E T S
The part where I just winged it.
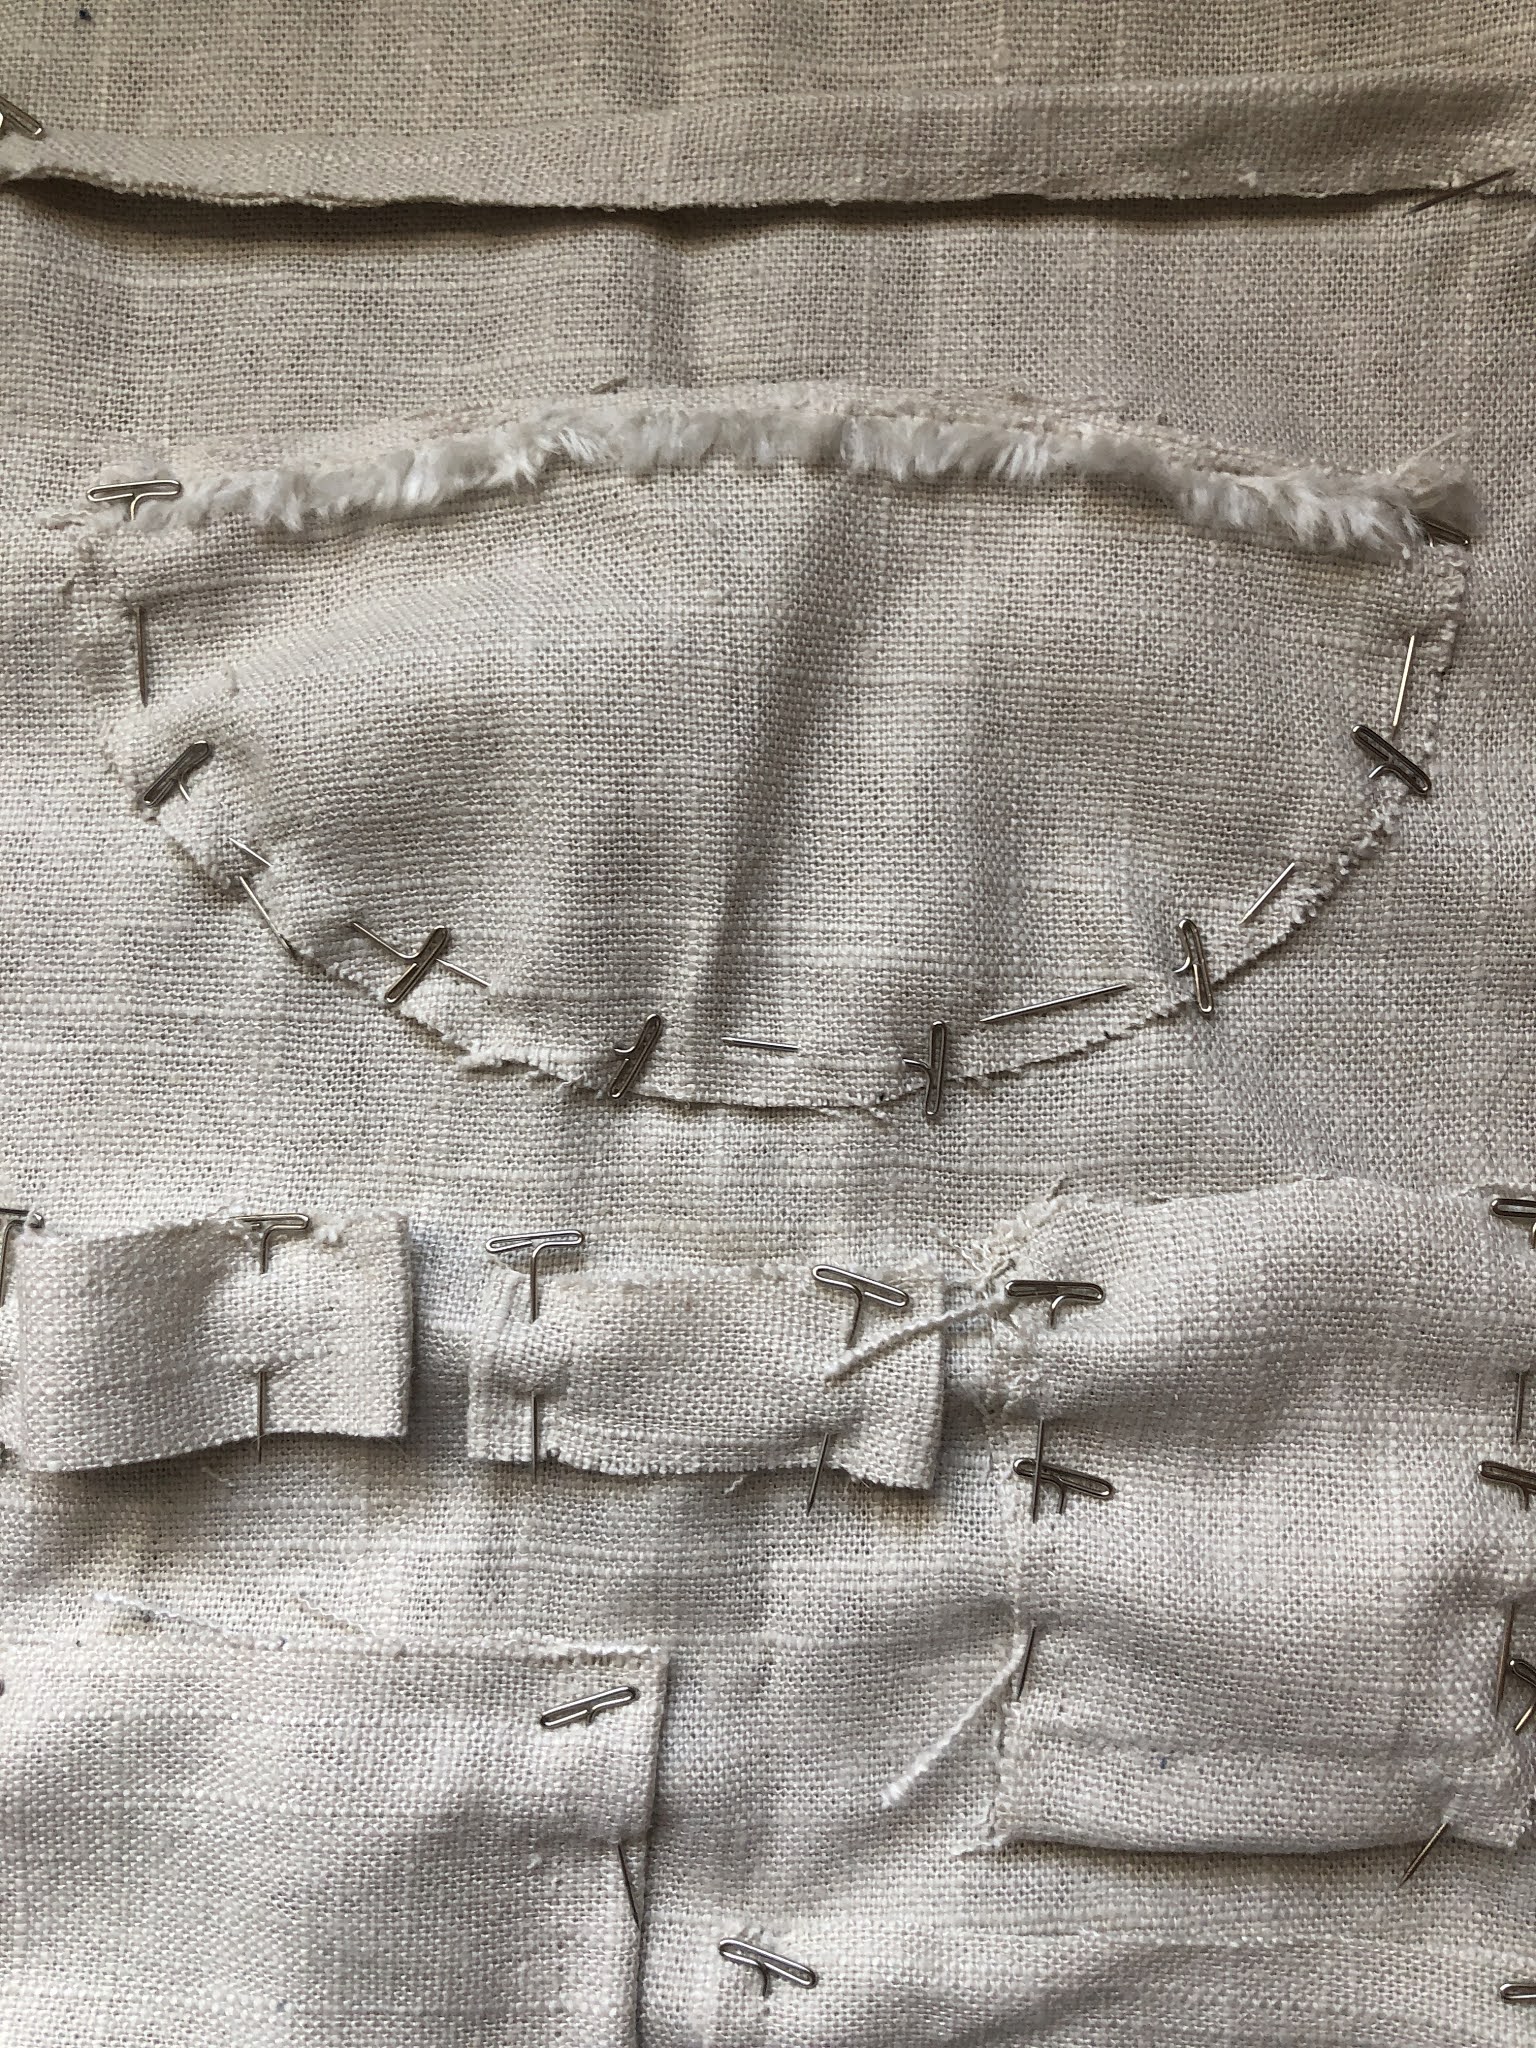
With whatever scraps of fabric I had left, I formed little squares or random fitting shapes. In order to get a real idea of what I wanted the wall pocket to look like, I gathered inspiration from this Anthropologie wall pocket (link below) which costs almost $150!! No doubt it seems a lot bigger than mine, but it seems like I saved a lot of money too (I also spent a lot of time...).

I was quizzically looking at pocket diagrams on Pinterest, but I honestly didn't think I could figure out how to make those advanced pockets with the amount of time I had. That's another weird thing of mine - if I do a project I want to do it the best I can but as fastest as I can. It's like this internal clock where I can't rest until I finish it with satisfaction. I'm not that advanced in sewing, so I'm excited to learn more with future projects. As you can see above, I decided to just hem the pockets.

Very scruffy looking. I wasn't paying too much detail to precision and alignment. Just the arrangement.
Note that I also sewed the fluffy trim on top of this half oval pocket for the look! If I were to do this over again, I would definitely go back and hem the tops of the pockets. I left these raw and it was a mistake I couldn't fix until it was too late.

As you merely scroll down to see the final product in a blitz of a second, remember me and my pain of sewing all these darn pockets in attempts of making it presentable. And those lines to strengthen the fabric. Lines and lines and lines. (You're thinking - hey, I never asked you to do this). I know, sorry. Thanks for your support. So, dear friends, I present to you....
the F I N A L
Oh my gosh - did we finally make it to the end of this blogpost? It's 11 pm of this two day journey of sewing, take pictures, editing, and writing. I feel so accomplished as if I won Masterchef and am dancing around in an insane amount of confetti. Let's take a look into the final product!

Shout out to Joy for letting me borrow her twine! Thanks Joy for always graciously letting me borrow things 💓it must be annoying haha.


I needed a place to put all my bobby pins!

Hopefully this will forever stop those moments where I frantically rush around the house thinking "where my keys at????" (The lanyard is from Amazon, I did not paint it).

Airpods come in such a cute compact case, which unfortunately make it easier for me to place them in a different area every time I use them...

Get your scrunchies and hair ties! Also ft. one of my faithful high school running watches.

Luna approved!
Ahhh we did it! What. A. Journey. Thank you SO much for reading this blog post! Feel free to share this post and comment if you own a wall pocket yourself or have seen them before? Is it a common thing? Let me know if you enjoy the more informative DIY posts. A single comment honestly makes my day👇😊! I hope this post inspires YOU to go and create! What are you thinking of doing to revamp your own room now💭??
-thecreatingwarrior
You should call this series 'Rebekah's Room Revamp/Renovation/Redecoration' or whatever but you need to take this opportunity to use those alliteration skills! Also, you should make a post or a segment in your posts like "Rebekah's Recommendations" for podcasts or music :D
ReplyDeleteWow maybe I should get a wall pocket... but I'm more of a "I like mere decorations. The only function it needs to have is looking good" type of person haha 😄
Oo what a great idea, thanks for the recommendation! I'm definitely excited to do that.
DeleteHaha with your BTS wall
Looove😍😍 amazing what you can do with your leftover fabric!!!! Love seeing your creative process too!💜
ReplyDeleteThanks for your support!
Deletelol "can't understand why people like math"
ReplyDeleteThis turned out looking really good! I like Joy's idea - Rebekah's Room Revamp
my podcast recs for ur next project ;) - the dropout and crime junkie
Yayy I'm excited to listen to them:)
DeleteThis was SO CUTE ur sooo talented :,,)
ReplyDeleteAw thanks so much Ruth!
Delete